Master plasmid fundamentals, CRISPR techniques, AAV serotype selection, and antibody applications. Written by scientists, for scientists.
Subscribe
Lentiviral vectors have been a staple in molecular biology for over three decades. Widely used across various research applications, they have become indispensable tools for manipulating cells and organisms. They can be used for a variety of research purposes
Nobody’s perfect! This is a platitude I’m sure we have all heard. It’s a truth that extends to both people and the tools we use. Scientists utilize an array of tools that rely on DNA amplification and manipulation to produce and edit plasmids. These are prone to error — both ...
Addgene’s viral vector services allow scientists to conduct experiments faster, skipping the preparation steps of production, purification, and titering. Our newest viral vector service, AAV Packaged on Request has seen a fantastic response from the research community. Customers ...
The recent sweeping cuts to science funding, limitations to facilities and indirect costs, and increased tariffs present an unprecedented challenge to the scientific research ecosystem, not just in the United States but around the world. As an organization that directly ...
Ah, the notorious western blot: we meet again. So useful, yet so finicky to design and optimize. Today we’ll cover the normalization and loading controls needed for relative quantification of a western blot — and why you might want to be careful relying on so called ...
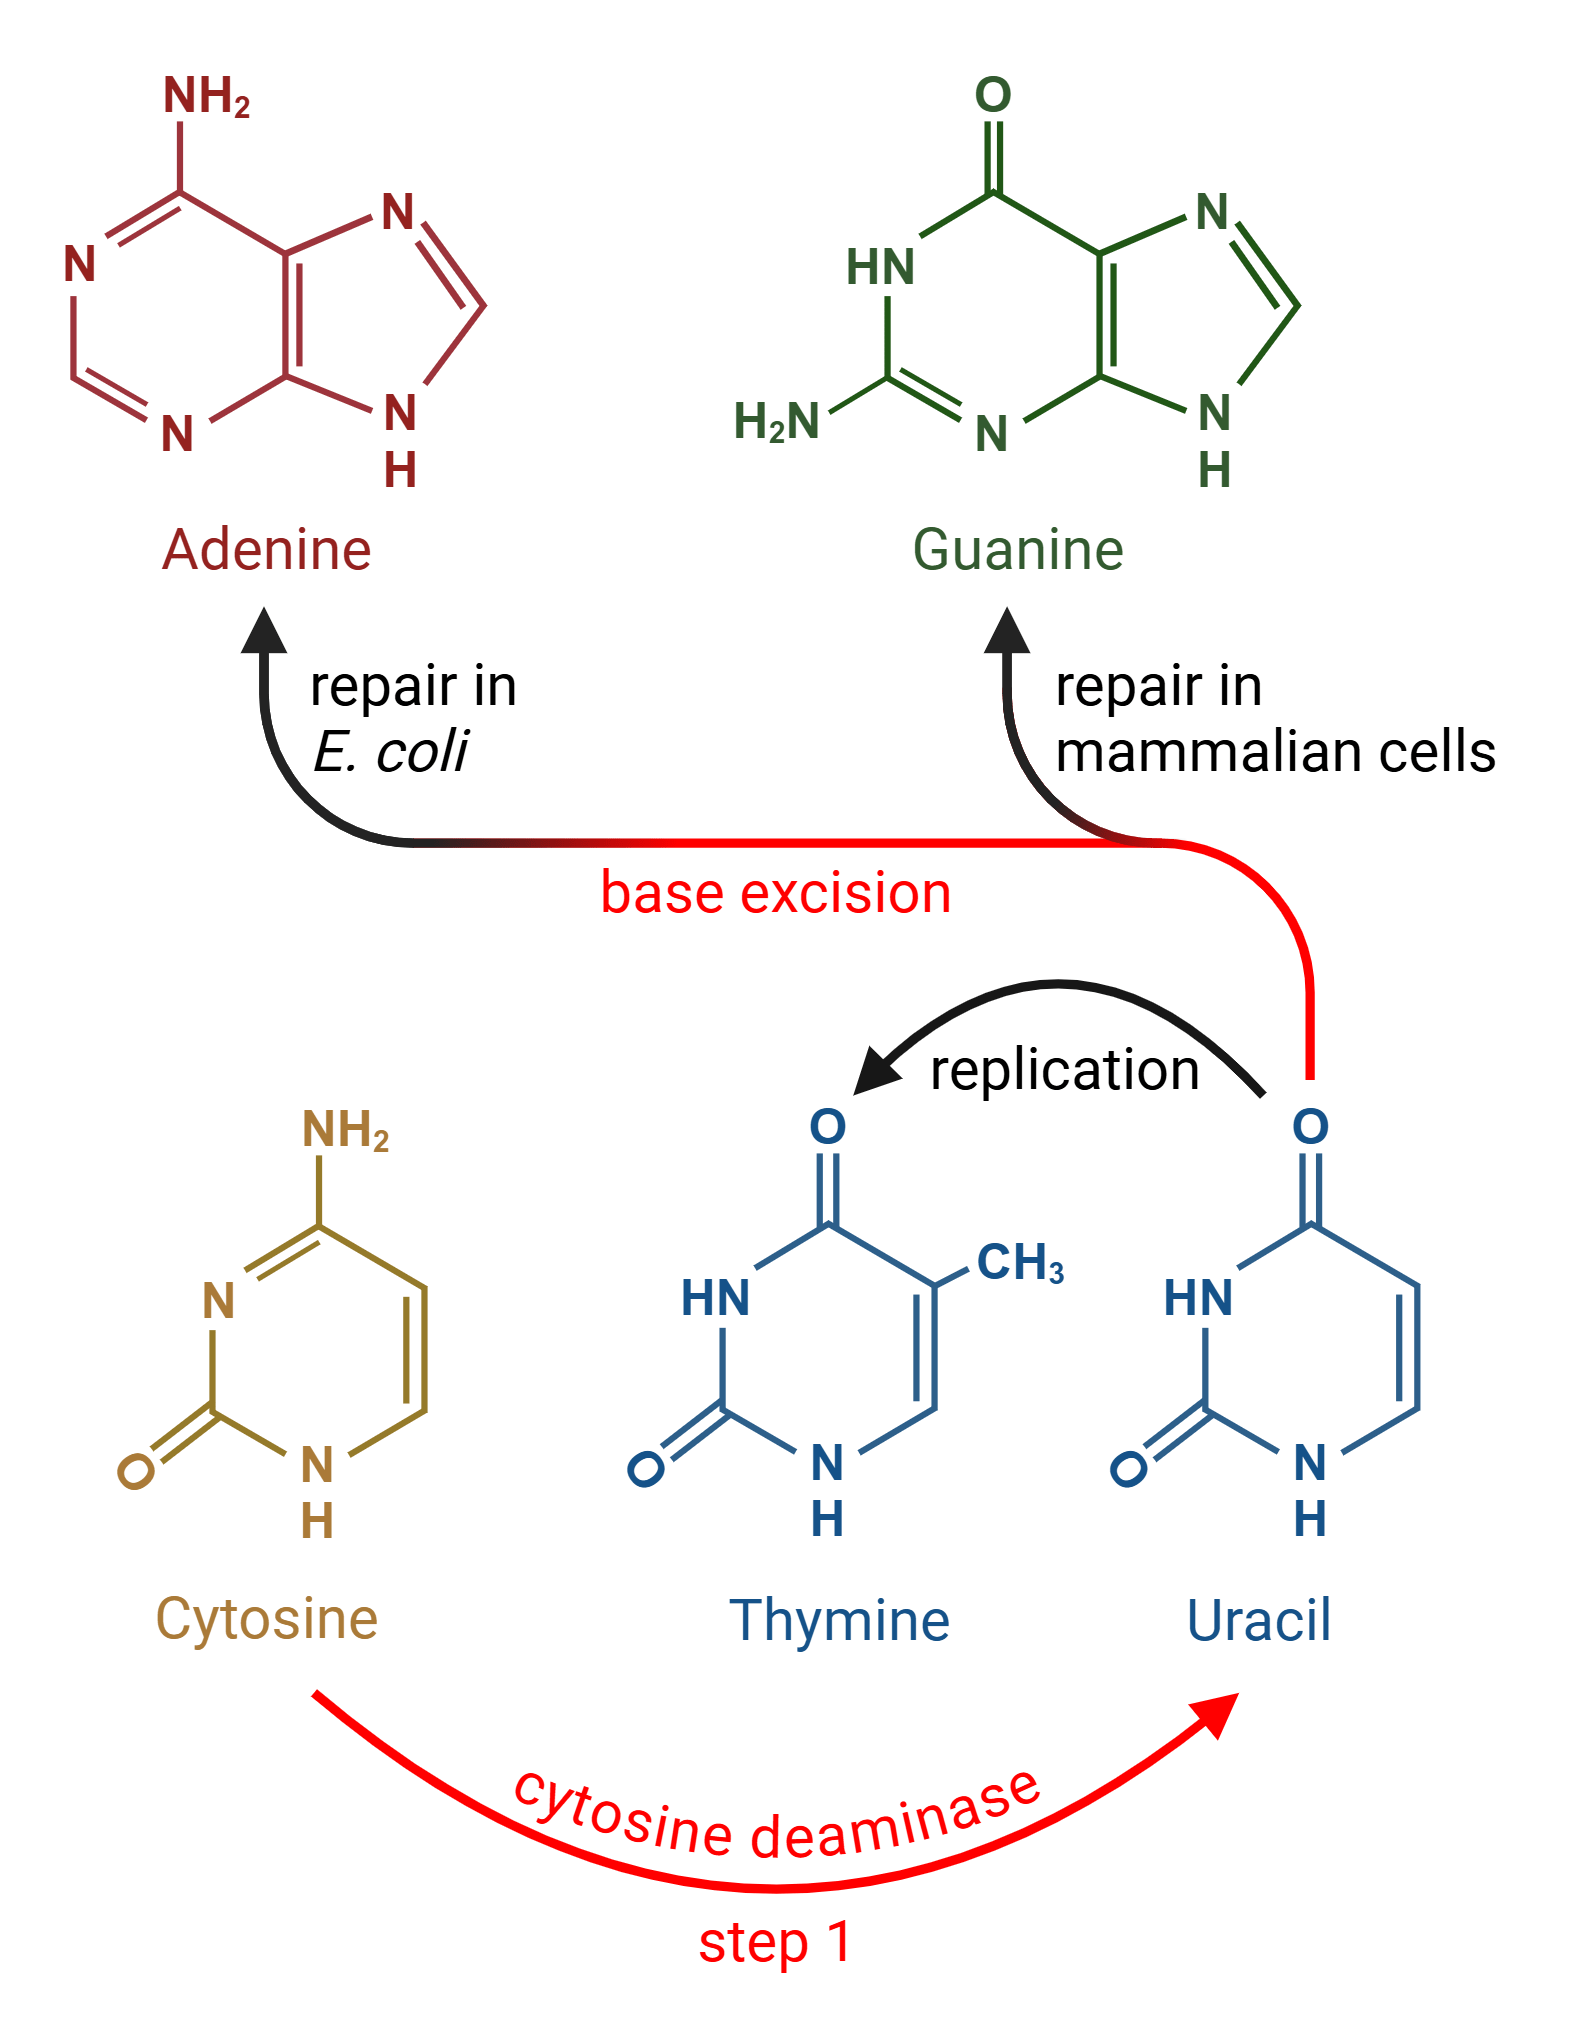
In our last post, we talked about the first base transversion editors: CGBEs, or C → G Base Editors. CGBEs first convert a cytosine (C) to uracil (U), just like Cytosine Base Editors (CBEs). But unlike CBEs, CGBEs then excise the U to create an abasic (empty) DNA site using ...
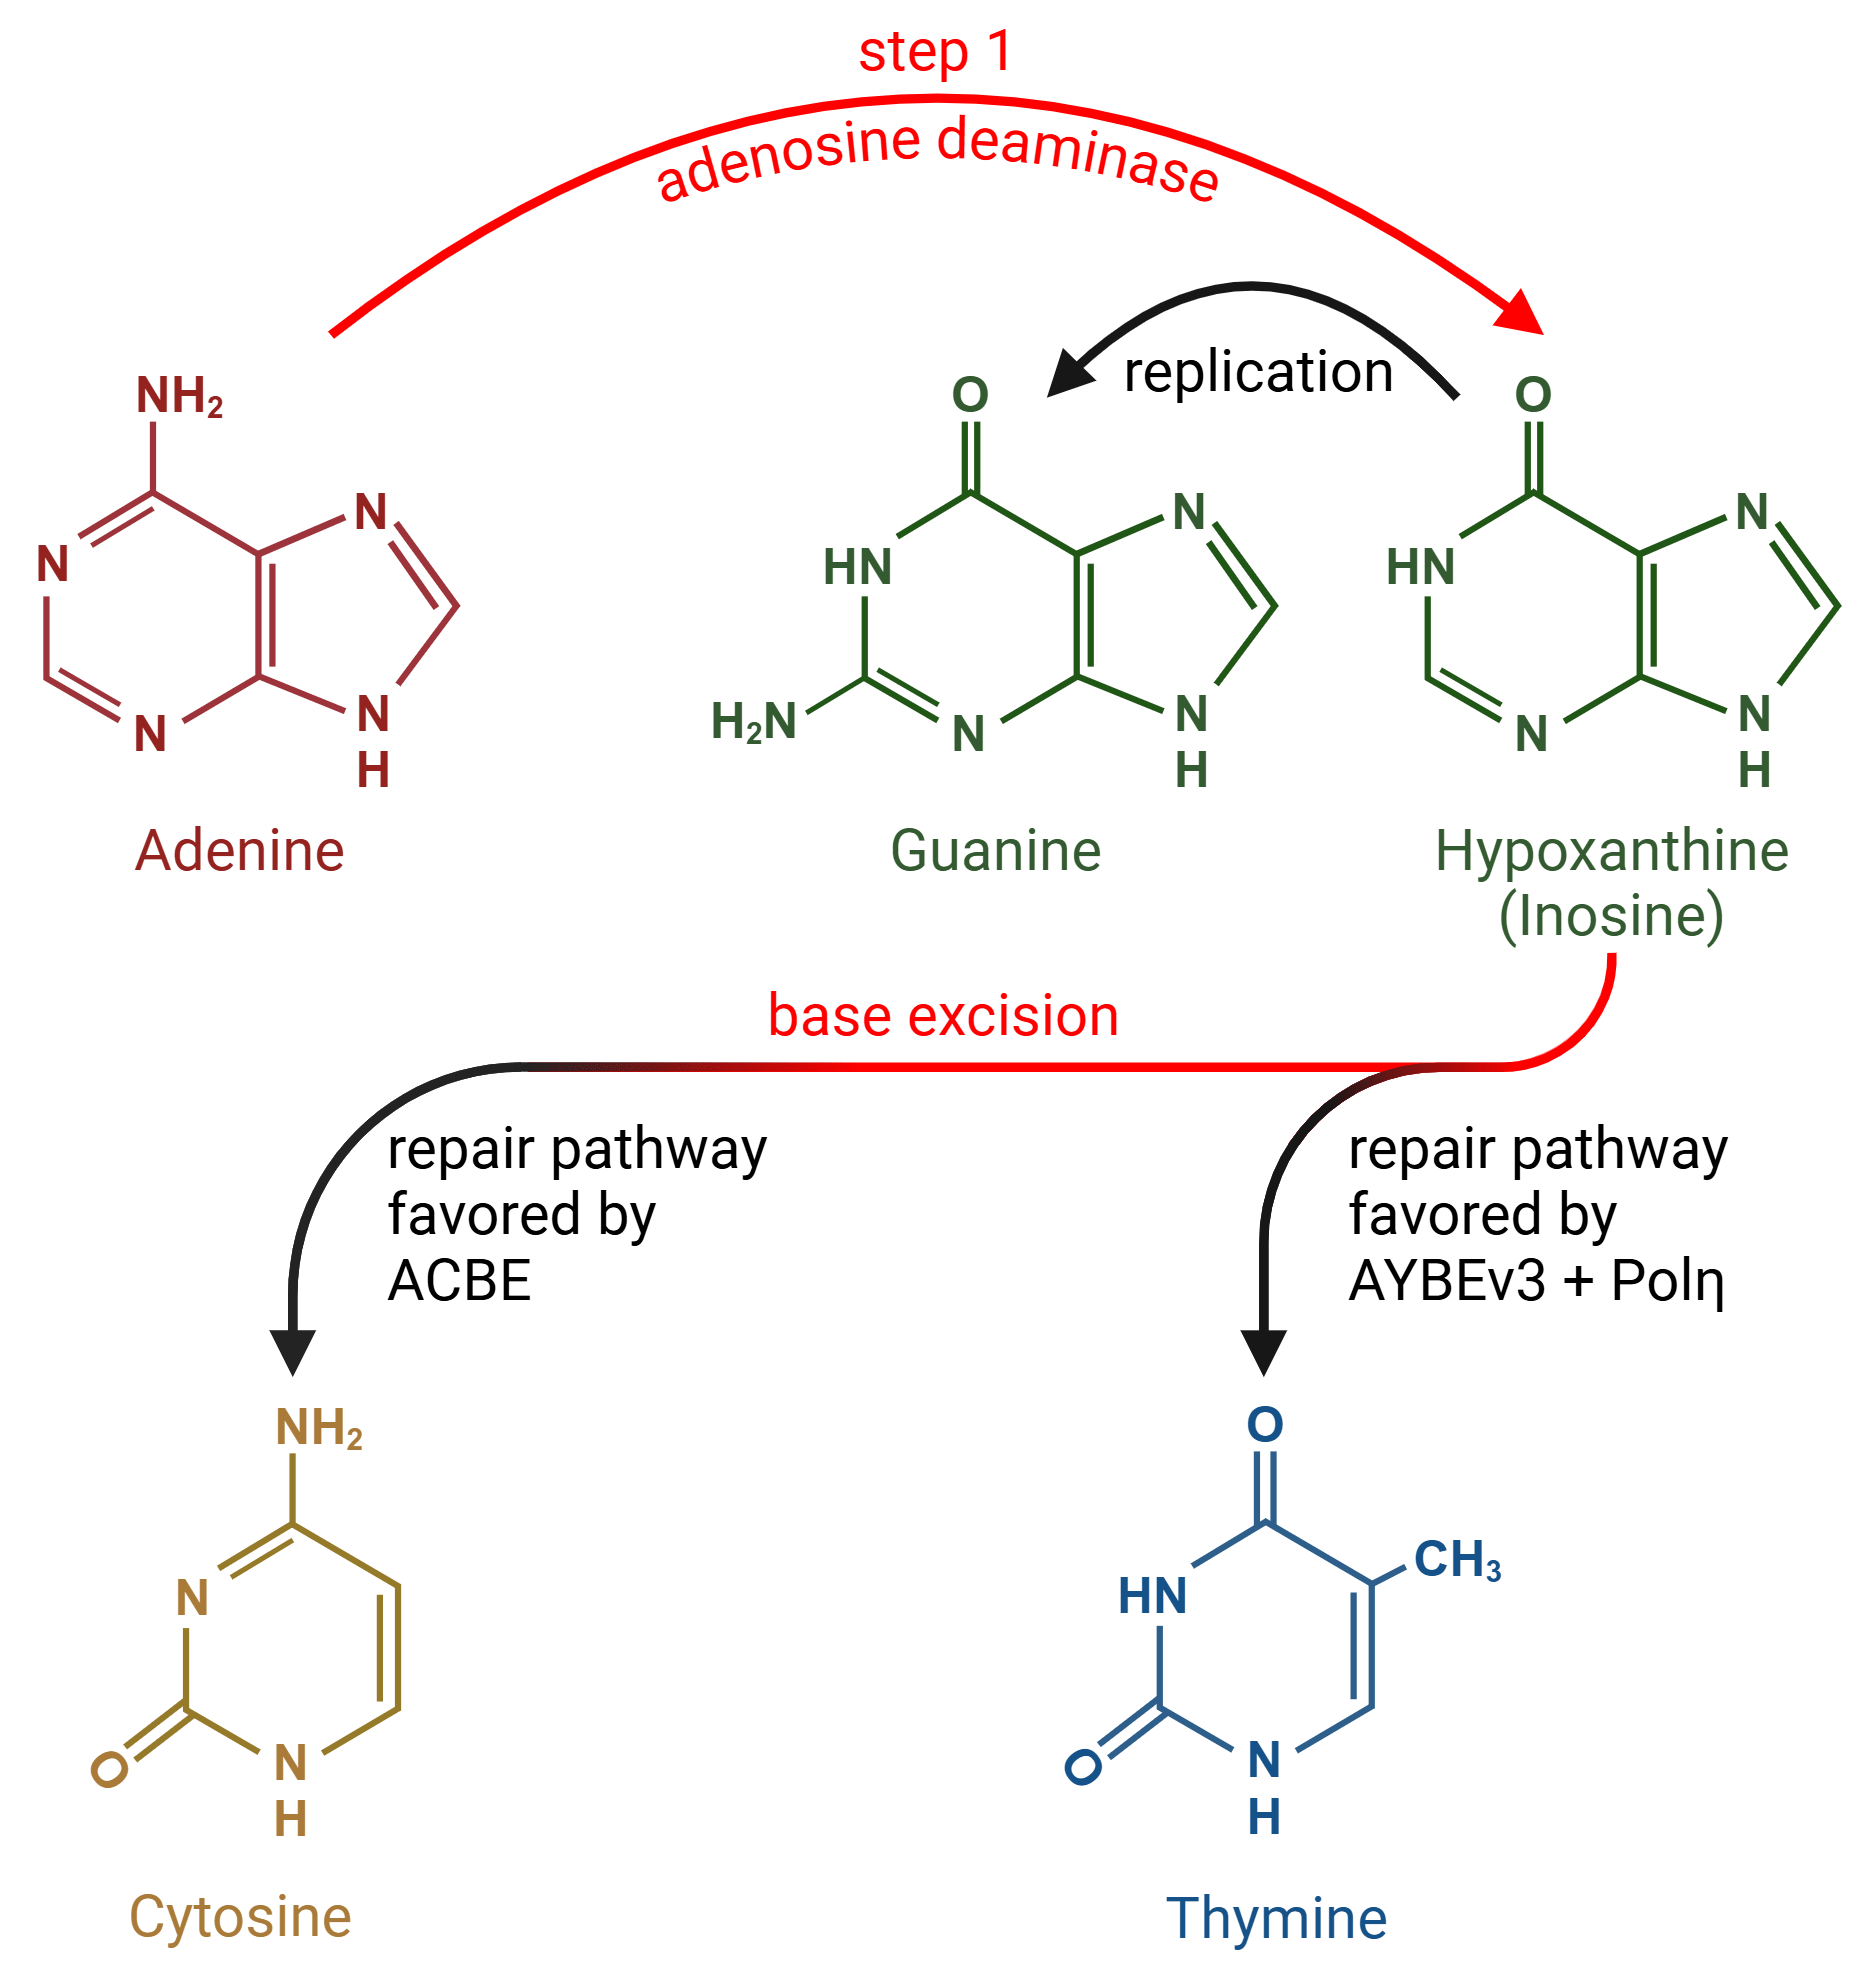
The first base editors revolutionized CRISPR gene editing. Cytosine base editors (CBEs) and adenine base editors (ABEs) chemically modify target bases without breaking the DNA backbone, making them efficient and precise tools for altering DNA sequences. These first base editors ...