From the beginning, one of Addgene’s goals was to ensure the scientific community obtained high-quality data for our DNA-based reagents. Not only do we extract as much information as possible from depositing laboratories and associated publications, but our quality control (QC) standards have evolved over the years to keep up with the latest tools. In Addgene’s early days, we would ‘spot-check’ critical regions of plasmids deposited with us via Sanger sequencing, while more recently we have moved to full plasmid sequencing at our facility using Illumina MiSeq Next Generation Sequencing (NGS) technology.
As our repository continues to expand, we realized the need to modernize our approach to handle larger volumes of data. In this two-part blog series, we will describe the importance of bioinformatics at Addgene and how our search for solutions led us to a partnership with Seqera Labs.
DNA sequencing drives our bioinformatics needs
|
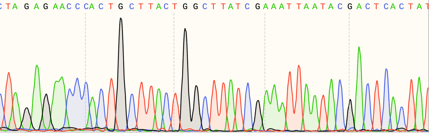
| Fig. 1: QC'ing data at Addgene is like standing under a Niagara Falls sized rainbow |
Over the years we have accumulated more than 300,000 individual nucleotide sequences. More than half of these sequences were generated by Addgene as part of our QC process. Automation and continuous development of in-house software has been crucial for us to keep pace with our current need to analyze nearly 300 sequences each week. Our internal software was originally designed to help us work in large formats, such as 96-well microplates, and thanks to our dedicated product and development teams, frequent updates allowed us to scale our lab work as we grew. As the number of deposited plasmids increased, the accompanying sequencing data collection and analysis eventually outpaced our software, even with continuous updates. The generous donation of a Illumina MiSeq sequencer enabled us to perform the necessary sequencing on-site, but now we were presented with a new challenge: automating the bioinformatics steps needed to transform the raw sequencing data into a complete plasmid sequence that would be ready for our QC team to analyze.
Criteria for a bioinformatics workflow management system
As novices to creating a robust data pipeline that would be reliable and available for our teams to use, one of our first problems was deciding on the right system for us to start using. Prior experimenting with open source assembly algorithms meant that we already had a clear idea of the necessary steps to perform:

|
| Fig. 2: Quick-stepping to a FASTA file |
With our outline of individual steps to automate plasmid sequence assembly, and possible solutions for each in the form of one-off scripts or programs, our goal was to find a suitable software tool that could orchestrate the steps into a continuous pipeline.
We also recognized the software system that we chose needed to fulfill certain requirements:
- Customizable to our specific needs
- Modern and well-supported, so we could focus on our development instead of building the entire ecosystem
- Proven performance with other bioinformatics purposes
- Integrated user interface, so our QC team could initiate and monitor the entire pipeline.
Benefits of Nextflow for bioinformatics pipelining
In many use-cases, including ours at Addgene, the overall purpose of a data pipeline is to perform several sequential computational tasks for which existing script(s) have been developed for a singular purpose (ex. adapter trimming, quality score analysis, k-mer counting, or sequence assembly), but the order and usage of the scripts needs to be customized in the pipeline for the specific needs of the user. Thus, a key criteria we were looking for was the ability to re-use or borrow existing code and control how the various pieces were connected, as this enabled us to rapidly iterate and optimize our pipeline.
After reviewing and testing several platforms for engineering pipelines, we selected Nextflow, a workflow management system for scientific pipelines, including bioinformatics. We loved the parallels between Seqera’s mission and our own, as both address the need to accelerate science using different approaches. We were also encouraged to see that a community of Nextflow supporters existed who had created a shared resource of pipelines for genomic data.
Thanks to the flexibility inherent in Nextflow’s design, we were free to use multiple programming languages (Python, Perl, Java, R, etc.) in our pipeline. Crucially, this adaptable property gave us the freedom to use multiple open-source sequence assembly tools at the appropriate place in our workflow without having to translate or convert programs to a uniform language.
The modern architecture of Nextflow included built-in support for containers, such as Docker. If you’ve heard of containerization, but haven’t tried it or are confused by the concept, don’t worry–you are not alone! The benefits of containers are they are designed to ‘contain,’ in a complete package, all of the pieces of software that depend on each other for the entire package to run. The small, portable system provided by a container is sequestered from other programs running on a computer, so it safely operates in isolation, and can be easily shared with others without any complicated setup. We created, tested, and debugged each of our pipeline steps within its own container because of the reproducibility containers provide and for convenient compatibility with our internal software infrastructure; however, it is not necessary to use containers with Nextflow.
For each of the sequential tasks in our pipeline, we wrote a separate Nextflow process. In Nextflow, a process defines which command or script will run and can be thought of as a particular step in the overall pipeline. By specifying the output of an initial process as the input to a subsequent process, we linked each step in our pipeline together. Since each process can use a unique container, we customized each container for its particular purpose and knew we could rely on the containers to produce the same output regardless of who or which computer ran the process.
Another design choice we appreciated about Nextflow was how effortless it was for us to switch between executing our pipeline on a local computer or in a cloud environment. Given the throughput necessary to keep up with our sequencing instrument (hundreds of plasmids each week!), we already planned to use cloud computing resources. Now, we could iterate our development and testing cycle faster due to the ease of jumping back and forth between running the pipeline locally and in the cloud.
Creating a bioinformatics workflow in Nextflow
Establishing a complete pipeline however, required more than just identifying criteria that we needed. Prior to using Nextflow, we routinely wrote Python scripts, queried our database with SQL or Django, and executed code in Jupyter notebooks using familiar libraries such as Pandas, Numpy, and Biopython.
We started at the usual recommended place: documentation. We oriented ourselves with the basic concepts and vocabulary of Nextflow so that we could translate our pipeline steps into processes and then connect the steps using the output from one process as input to the next via a Nextflow concept known as channels.
Since a Nextflow process can utilize any scripting language that can be executed on Linux, we created our first process by simply copying and pasting pieces from our existing script into the script block of the Nextflow process.
Next, we specified the input and output channels for the initial process and tested it by running the main Nextflow script file (containing our new process) on our local computer. Eventually, our workflow would handle plasmid sequences on a 96-well plate basis, but for rapid testing and refinements, we specified a select small number of input file names or filtered the input channel to only use the first n items. To be sure, we went through much trial and error to learn the scripting language, but our path forward was clear: to build one process at a time and connect each subsequent process to the existing ones.
Once our first process was working as expected, we moved forward with creating the next process and linking the output from the first process to the second process. For example, our bbduk process created trimmed FASTQ files as output, which we specified as input to the subsequent bbmerge process.

|
| Fig. 3: How we get bbdone with our bbduk process. |
At first, to make sure we understood the concept of channels and implemented the input declaration correctly, the script block in the second process printed one of the inputs, such as the file name. We started small with a print statement and tested that the desired data was available so we felt confident we were using the input and output to link the processes correctly.
After this validation check, we repeated our strategy and copied a few lines of our existing script into the section of the next process. Similar to our first attempt, we manually inspected the output with a print statement at the end of the script or by opening the files. By working on one process at a time, and testing a small set of data each time a new process was added, we progressively constructed the entire workflow in the Nextflow script.
With our completed pipeline, we could adjust the compute resources when needed, for faster runtime and decreased cost compared to purchasing and maintaining our own infrastructure.
Our patchwork collection of scripts evolved into a single, organized pipeline and accelerated the processing of our sequencing data. However, our work still wasn’t complete. In order for our QC team to smoothly operate the pipeline, we needed a user interface. In our next post, we’ll share our story about how we used Nextflow Tower to augment our pipeline and enable our team members to automate their weekly sequencing tasks.
More resources on the Addgene blog:
The Power Behind NGS Plasmid Validation: Seqwell
How to Keep a Lab Notebook for Bioinformatics Analyses
AAV Vector Quality Control: Going the Extra Mile with NGS
Topics: Bioinformatics


Leave a Comment