Creating great educational science videos is tough. Is the content accurate? Are we conveying complex ideas in the easiest way possible? Are the shots clear enough for the audience? As Addgene’s Science Video Production Specialist, I’m constantly thinking about ways to improve our productions to deliver the best possible videos for free. We’re a small operation, so sometimes it can be a big challenge. But ask any filmmaker or videographer and they’ll tell you, a lot of the fun is building within the constraints given. And there were many constraints during the COVID-19 pandemic.
The Pandemic Pivot
Back in March 2020, just four months after I started with Addgene, I was about to have a check-in with my boss Jennifer. I had finally found my footing with the company. I’d identified the ways to get the most out the resources we have, and we developed a great plan to start consistently knocking out high-quality videos for you all. The next day...we got sent home for what we thought would be a couple months.
Jennifer and I spent about an hour that morning scrambling. Everything we had set up involved multiple people in tight locations. Conference rooms for on-screen presenters! Labs and benches! Everything was out the window.
So, much like SynBio, it was time to start our Design-Build-Test-Learn cycles. If you’re not familiar with this, it’s a method for building and testing new products or methods, using metrics and feedback, taking a look at what works and what doesn’t, and trying all over again. Here’s that process!
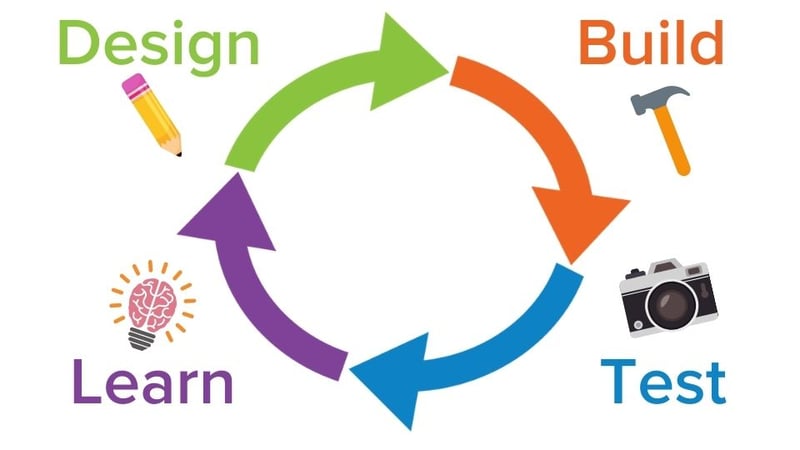 |
| Figure 1: The Design-Build-Test-Learn cycle adapted for video making. |
Cycle One: The Ironing Board Control Center
With the pandemic in full swing and everyone working from home, how were we going to film anything? We had a couple options. The first was to put me on camera, filming myself. While easiest from a production standpoint, it wasn’t ideal for our Lab Protocol videos. It’s really nice to have a scientist on-screen, somebody who really knows the protocol and can guide viewers through. I know cameras, but we needed someone else.
Design: Jennifer thankfully volunteered, and we decided to focus on a protocol that didn’t require any lab shooting, just animation. The plan was for her to shoot everything from her home, while I would direct “virtually” via a webcam. In the office, we use a Black Magic Pocket Cinema Camera 4K. It’s wonderful and simple to use, but when you need to juggle filming and performing on camera, it’s a lot to handle. We decided the easiest course of action would be to use an iPad to shoot.
Build: Jennifer created a mobile camera area that included iPad and her laptop raised on an ironing board, giving it the perfect height (Fig. 2). We recorded video using a simple, external video recorder and a mic clipped to her shirt. She rolled several long takes, and we cut it up in post.
Test: Overall, it worked. We pulled it off! Check out the PCR Primer video!
Learn: Producing videos like this would prove to be difficult. Shipping the gear, and walking everyone through the recording process was going to be time consuming and difficult. Finding volunteers who had space to shoot was another hurdle. As we slowly started to realize that we were going to be out of the office for longer than anticipated, we had to think of something else.
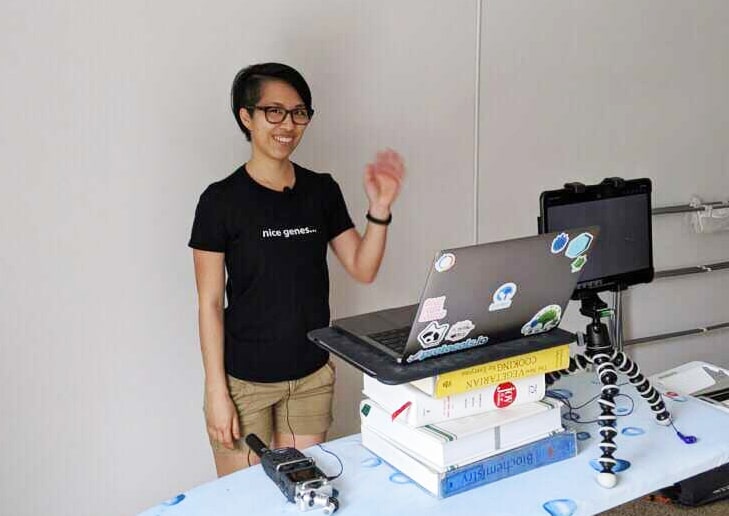 |
| Figure 2: Ironing boards. Good as a WFH desk, and as a video control center. |
Cycle 2: Zooming Forward
Design: We produced a video celebrating Massachusetts Nonprofit Day, which was the perfect opportunity to test shooting over Zoom, everyone’s new favorite third-party video conferencing software. Interviewees could simply boot up Zoom and record themselves talking to their webcams.
Build: I sent the participants interview questions they could answer, and I’d cut together a video from their recorded answers. No scripting made this a lot easier and I didn’t need to be there directing. Everyone’s schedules were busy, so it was important for me to let people record at their leisure. For virtual B-Roll (that’s the secondary footage you often see playing over the voice-over in videos), I sent some directions and (rules) to some volunteers, who filmed with their phones.
Test: I loved the end result, but it was clear this wasn’t going to work for our other videos. For starters, I hadn’t anticipated nearly every webcam recording only 1280x720 resolution at best. Some came in even lower.
Learn: While this works well for social media videos, we need as much detail as possible when showing lab methods. So, this just wasn’t going to work for the majority of our educational videos. In addition, it’s really asking a lot of someone to be comfortable on camera while thinking about things like lighting, camera angle, and shot composition.
So back to the drawing board.
Cycle 3: A Return to HQ
|
|
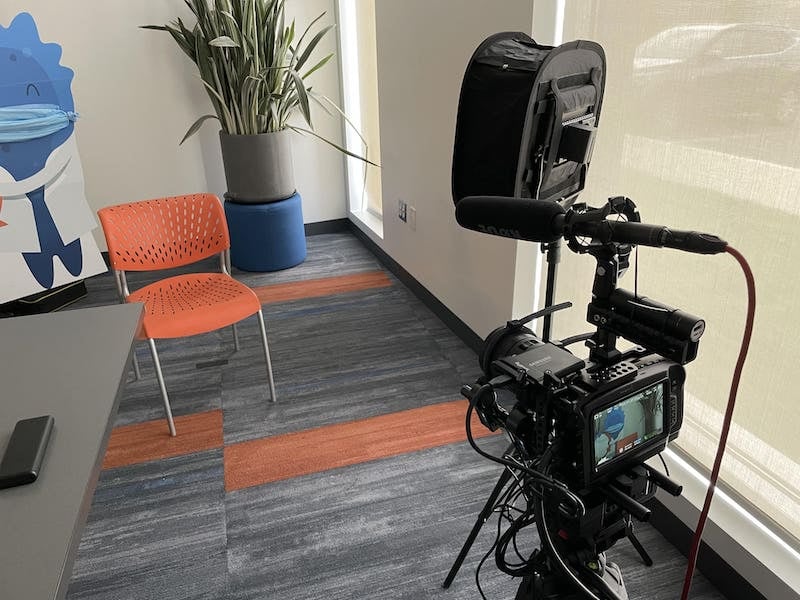
| Figure 3: Even Blugene is practicing social distancing and wearing their mask. But while the camera is here, the operator is in a different room. |
Design: The previous cycle made me realize we needed to focus on ways to shoot safely at a distance where I could focus on camera and audio, and the on-screen talent could just focus on their interview or performance. By this point, towards the end of the summer, things were getting better and the office had partially reopened. But there were still many restrictions in place, most importantly, masks.
Besides the muffled voices beneath masks, humans rely on mouths to help them hear and read emotional cues. We had two options: Film outside at a distance, or film inside with one person in a room. I wouldn’t be in there with them.
I knew from my previous cycles that I wanted to be able to talk to people and direct them. For interviews, being able to ask follow up questions, or ask people to rephrase questions was key. I had also hoped that just having me there would ease people enough.
Build: If you’ve ever watched any behind the scenes footage in the last several years, you can usually see a director sitting in their chair not watching their actors live on set, but peering at a 7-inch wireless monitor. Wireless video technology has gotten very impressive, but due to costs and availability, a traditional solution was completely out of reach for Addgene.
So, onto research! I needed to design a system that would allow me to set up a camera in a room, but still have control over focus, zoom, stop/start record, and allow me to see an image.
- Remote video: So first things first was getting that wireless HDMI transmitter/receiver, to beam the camera’s image to my remote location, live. After doing a bit of looking, I found an inexpensive HDMI transmitter that could transmit a signal between a wall. There was a SLIGHT delay, but I could work with that.
- Focus: Next up, I found a wireless follow focus system. Follow focus systems allow you to control the focus or zoom on a camera lens without having to physically rotate the rings around the lens. It allowed me to focus on the subject after I’ve left the room.
- Microphone: Lastly, I needed to figure out a microphone situation. Generally, I record into an external recorder using a lav mic, clipped to the talent’s shirt. But knowing I would have multiple interview subjects, I positioned a boom mic just out of frame allowing people to sit without having to worry about getting in close to mic them up.
- Monitor: I then set up a monitor connected to the wireless transmitter and an iPad in the office next door (connected via bluetooth to the camera, to control some basic functions, including starting and stopping recording).
Test: It was unbelievable how well this worked! Interviewees found it easy to drop into a chair and chat with me remotely via an audio chat (Fig. 4).
Learn: This works great for on-camera presentations and interviews. But how can I adapt this setup for the lab, so we can get back to producing protocol videos?
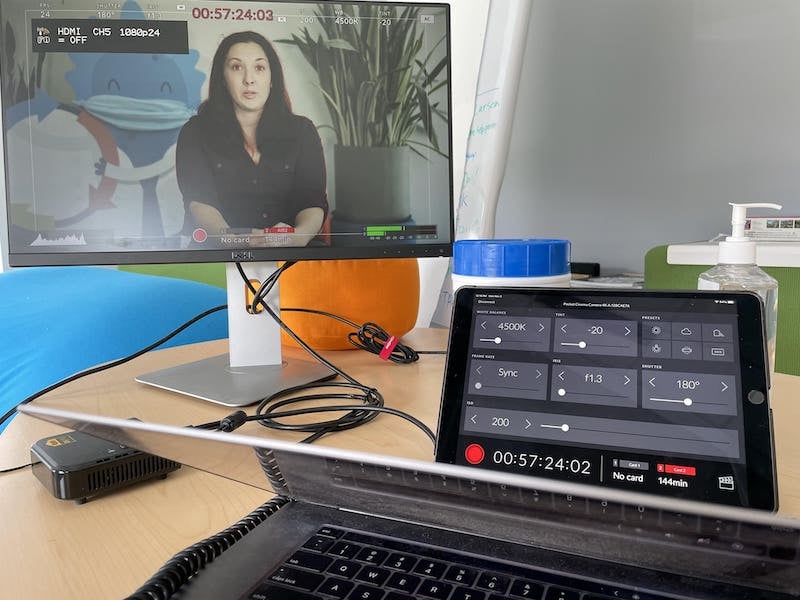 |
| Figure 4: The remote directing setup, complete with wireless video receiver, camera control, and extra hand sanitizer. |
Cycle 4: Venturing into the Lab
Design: The lab is the beating heart of Addgene. It’s why we exist, storing plasmids, and distributing them to labs that need them. The lab re-opened very early in the pandemic with some incredibly strict safety protocols to keep Addgenies safe. Space was at a premium, so I had to figure out a solution for that. Normally, shots require me to get in close proximity to people and the objects I’m filming. I needed to be 6-10 feet away with a camera, OR, monitor from that distance.
Build: We got a wheeled stand and mounted a monitor to it. It had an extension cord attached, with the option to mount a battery to it if necessary. I could still control the camera from a distance if I needed to be close on a subject, or I could manually control the camera by hand and zoom from a distance. Since everyone in these shots (and me behind the camera) would remain masked, it freed us up to be creative.
Test: Our first official shoot went off with almost no hitches. The wheeled stand was a bit cumbersome, but it was mobile enough to travel around the office with me, and to move it out of the way when it was blocking some more important lab work from being done. You can watch the first video in our Intro to the Lab Bench series about PPE! We made this with a combination of in-lab filming and remote filming.
Learn: There were still a few adjustments I wanted to make to ensure smooth filming in the future, but we were finally refining the process down to a place I could be happy with it.
Cycle 5 - The Future!
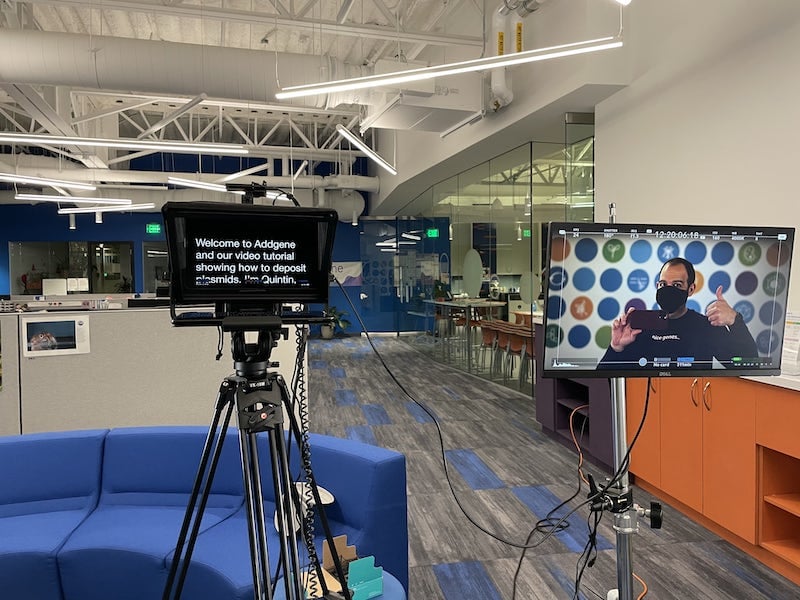 |
| Figure 5: The mobile monitor and teleprompter being repurposed for a different shoot to create the How to Deposit Plasmids video. Shot without anyone else in the office. |
I try to build every setup with an eye to the future. I don’t want to acquire gear that’s only good once. Even when things return to relative normalcy, I’ll be incorporating that mobile monitor stand into every shoot. I also added a teleprompter to the mix, adapting the setup to run some remote interviews, so the interviewee could see the interviewer. We’ve got some really cool video projects lined up, some that started production during the middle of lockdown, and some that will spin up real soon. Video production, just like science, is always about iteration and improvement. You have an idea, you test it, you learn from it, and then you adjust. But that’s what keeps things interesting. And hopefully they’ll be just as interesting as the finished product for you, the viewer.
While you’re here, why not check out all of the written and video protocols at Addgene? If you need help in the lab, we have you covered.
Topics: Addgene News


Leave a Comment